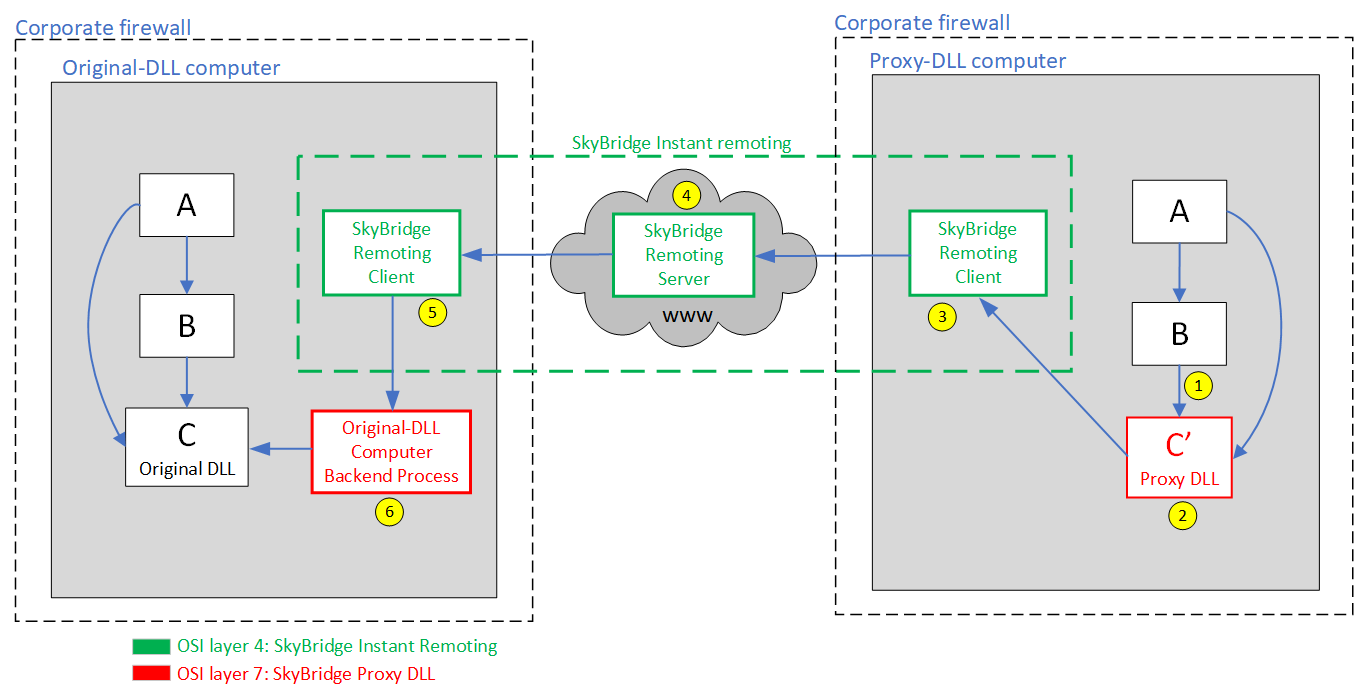
What is in the generated proxy DLL?
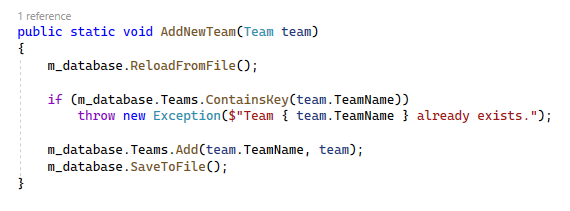
Following is the "AddTeam" function in an original DLL (in the example project). It loads the database, adds a new team and then saves it.
Following is the code in the "AddTeam" function in the generated proxy DLL:
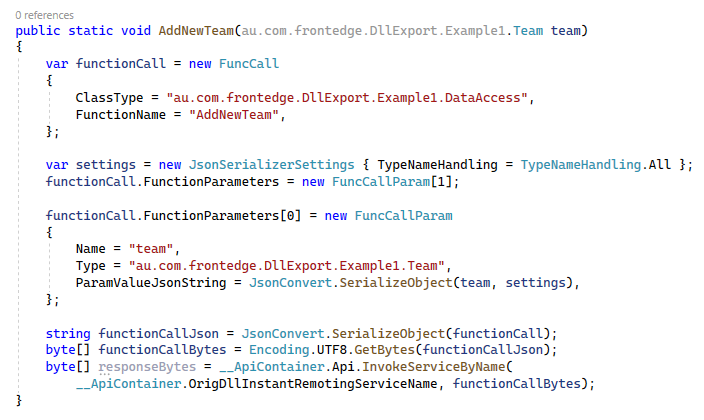
- It packages the invocation on itself into a JSON string.
- It converts the JSON into a byte array and sends it to the original-DLL computer via SkyBridge® Instant Remoting by calling the "InvokeServiceByName" function.
- The backend process on that computer invokes the "AddTeam" function in the original DLL and returns the result via SkyBridge® Instant Remoting, which becomes the returned byte array "responseBytes".
- Since this function has a "void" return type, this returned byte array is empty and discarded. Otherwise it would have been converted back to correct data objects and returned to the caller.
Points of innovation and patentability
- It retrieves the public interface of the original DLL from its metadata (its functions and the parameters of each function) and generates the source code of the proxy DLL with the same public interface.
- Inside each method, the generated code contacts the SkyBridge® Instant Remoting layer to route the invocation on this method over the World Wide Web to the original DLL, then route the response back.
- The source code is then built into a DLL, which is the proxy DLL, and supplied to whoever wants to remotely invoke the original DLL.
- The backend process on the original-DLL computer also makes use of the metadata of the original DLL to invoke its methods on behalf of the proxy DLL.
U.S. Patent Application No. 18/165,065.
Points of excellence
- As shown in the above diagram, there are 12 steps in an invocation. Yet, a round trip between a computer in Australian and one in the US takes as short as 0.2 second.
- The SkyBridge® Instant Remoting server is extremely light-weighted and efficient. A single server can handle thousands of round trips each second. The number of servers can be automatically scaled up and down by AWS depending on the load.
- No registration needed to trial. Just download and run.
- Non-intrusive: No need to change your code to use our technology.
- No learning curve: two minutes to download and configure your dev PC. This full demo shows the timing.
- No ongoing effort after initial setup. It just feels as if everyone is coding on the same computer.
- It is inherently safe.
- Use it freely and anonymously if the usage is casual.
7-minute demo
In the following demo, a software house hires a remote developer to develop the UI of their application. The "Data Access" class library needs to access a corporate database, which cannot be given to the remote developer. They use SkyBridge® Proxy DLL to solve this problem.
This the full and uncut version of the above demo.
Download the Visual Studio project used in the above demo: .NET Framework version (.NET version will be released soon).
2 minutes to setup the original-DLL computer
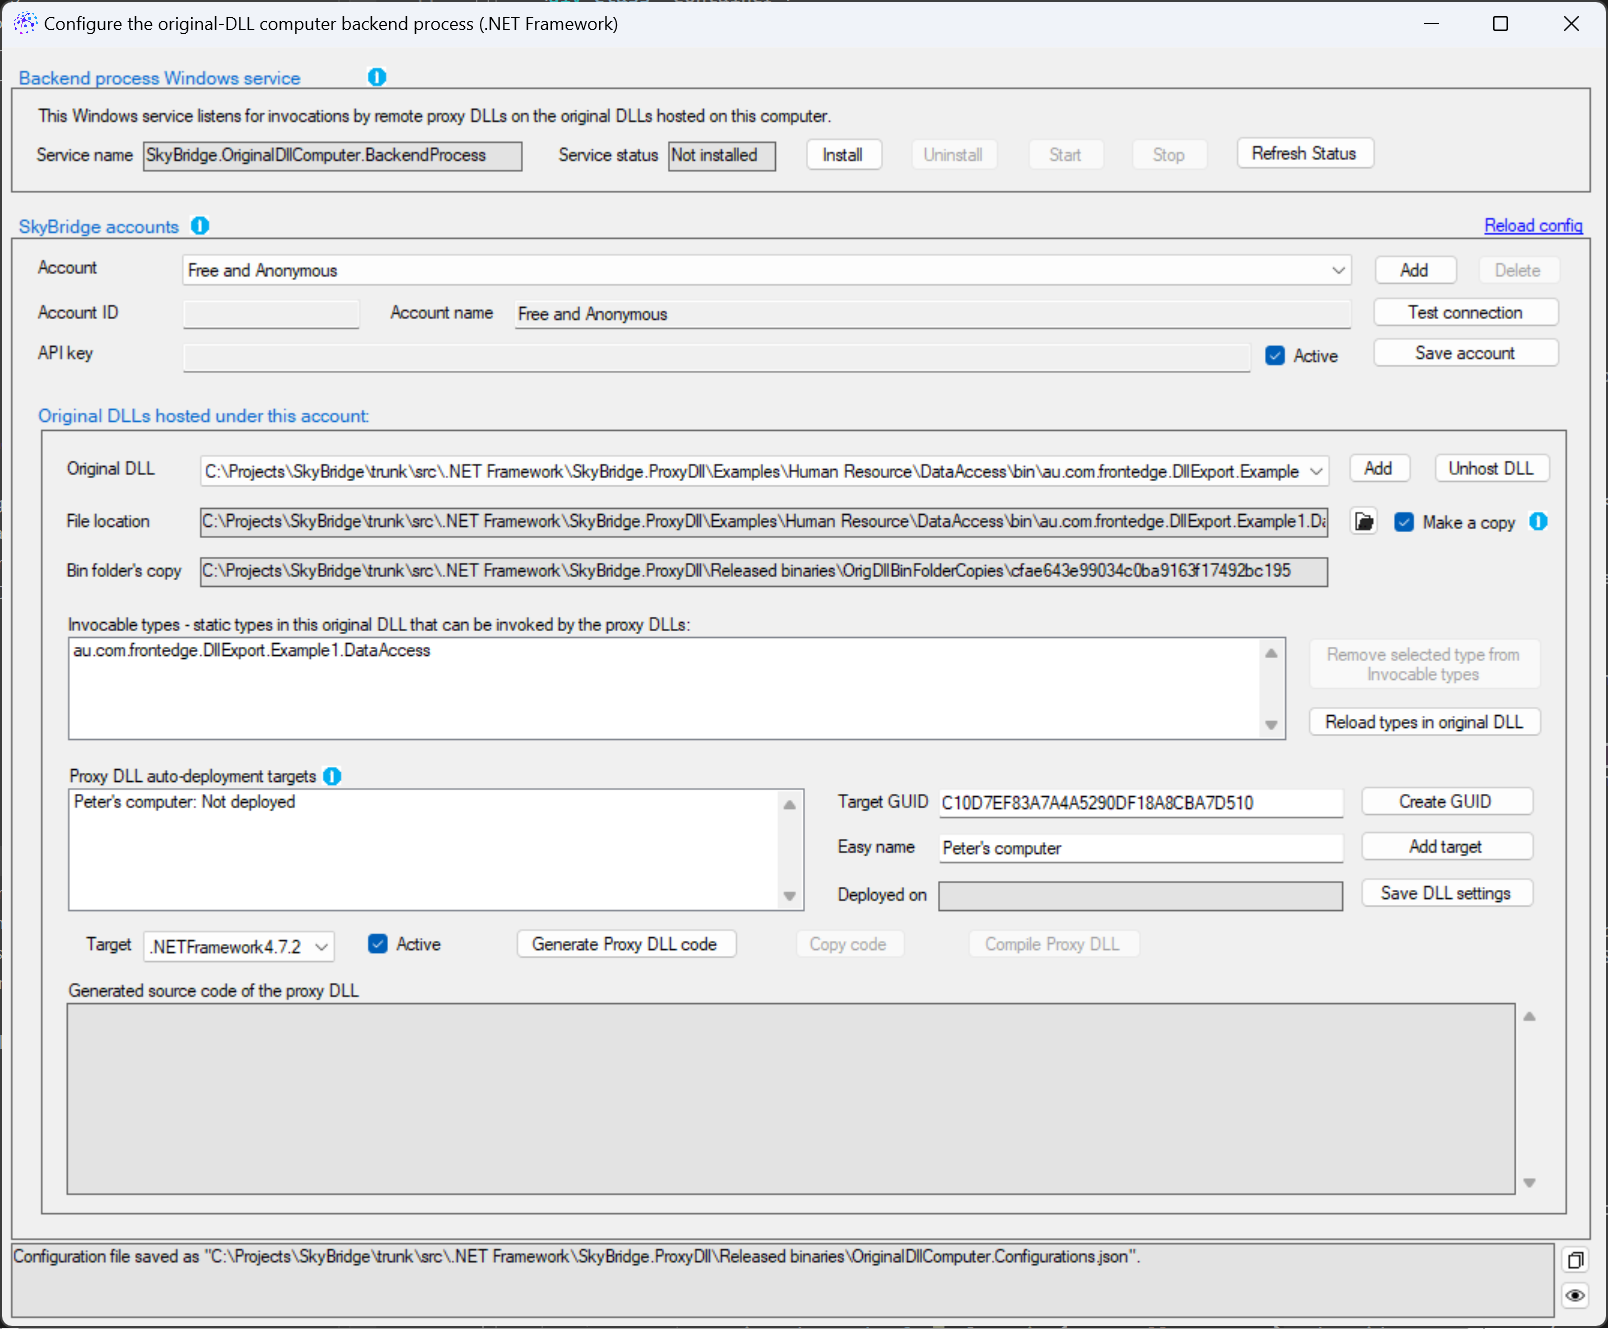
- On the computer that contains the original DLL, download SkyBridge® Proxy DLL - .NET Framework (.NET version will be released soon). It is a zip file containing all the binaries. You can place them in any folder.
- Double-click OriginalDllComputer.ConfigurationsManager.exe to launch the user interface in the screenshot above.
- Under the SkyBridge accounts section, leave Free and Anonymous selected on the Account dropdown box to use this technology freely and anonymously. The account registration part of the SkyBridge web portal is currently under construction.
- Under the Original DLLs hosted by this account section, click the open file icon to select your original DLL.
- For every computer to which you want to deploy the proxy DLL, click the Create GUID button to allocate a target ID. Then enter an easy-to-remember name such as "Peter's computer". Click the Add target button.
- Select the targeted framework such as "4.7.2" or "4.8".
- Click Save original DLL.
- Under the Backend Process Windows Service at the top, click the Install then Start button.
2 minutes to setup the proxy-DLL computer
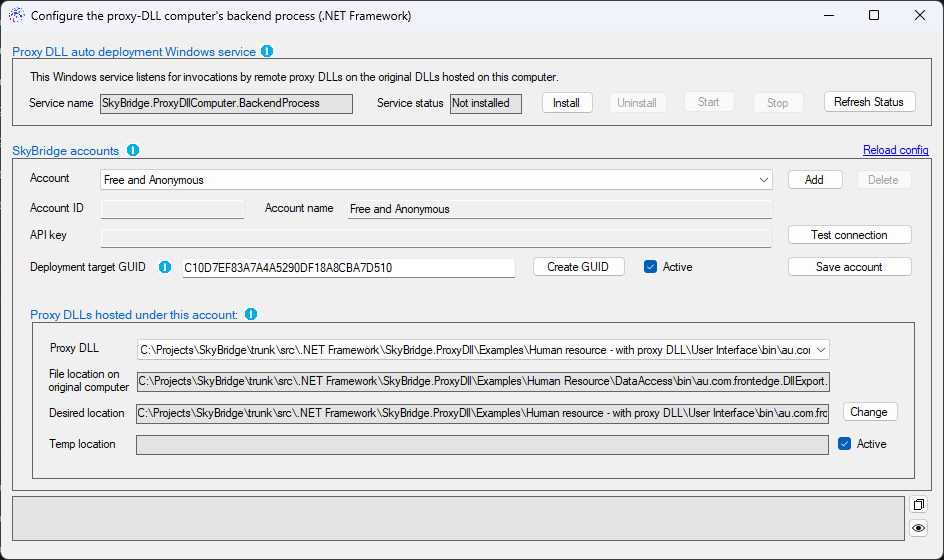
- Paste the target GUID (which was allocated when you setup the original-DLL computer on step 5) into the Deployment target GUID textbox.
- Click Save account button.
- Wait for 15 seconds.
- Click the Reload config link. The proxy DLL would have been sent to this computer from the original-DLL computer, and the File location on the original computer textbox would have been filled, and the Desired location textbox would have been blinking, indicating that you need to select a desired location for the received proxy DLL.
-
Click the Change button to open the "save as" dialog and select a folder in which the proxy DLL should be located.
NOTE: if the same folder exists on this computer as the folder on the original-DLL computer which contains the original DLL, then the proxy DLL would have been automatically saved into that folder, and this step would have been skipped. - On the project that needs to reference this proxy DLL, NuGet package SkyBridge.InstantRemoting, SkyBridge.OrigAndProxyDllShared and Newtonsoft.json.
- Finally, run the software on the remote computer and see the magic happening.
Documentations
SkyBridge® Proxy DLL Introduction
About us
Front Edge Software has been creating innovative software solutions in Melbourne Australia for decades.
CEO: Frank Lieu

